
Monitor Multiple Fridges and Freezers from One Dashboard with Monnit Sensors
One fridge is easy to check. Eighteen refrigerators and freezers across five locations are a different problem.
Manual temperature logs work only while someone is present, has time to check every unit, writes the number down correctly, and notices when a freezer starts drifting out of range. That leaves gaps overnight, on weekends, during busy shifts, and between locations.
A wireless monitoring system changes the job. Instead of sending staff from room to room with a clipboard, each fridge or freezer reports its temperature through a local gateway to a central dashboard. Staff can see current readings, receive alarms, and review historical records from one place.
That is the core idea behind using wireless temperature probes, Monnit gateways, and centralised monitoring for a multi-site refrigeration setup.

Why manual temperature checks break down at scale
Manual checks are simple at first. A staff member opens a fridge, reads a thermometer, records the result, then moves to the next unit. For a small site with one or two fridges, that may feel manageable.
The weakness appears when the equipment count grows.
A requirement involving 18 refrigerators and freezers across five locations creates several practical issues:
Staff may not be near every unit at the right time.
Readings only show the temperature at the moment of inspection.
A fault can begin just after the last check.
Paper logs can be missed, lost, or entered incorrectly.
Managers may need to chase multiple people for updates.
After-hours temperature events may not be noticed until the next shift.
The risk is not only that a temperature moves out of range. The larger issue is delayed awareness. If a freezer fails at night, the first sign may be a warm reading the next morning. By then, stock, samples, or stored goods may already be compromised.
A central dashboard solves this by making each refrigerator and freezer visible between manual inspections. It does not remove the need for good procedures, but it gives the team live evidence instead of occasional snapshots.
For organisations evaluating Wireless Fridge Monitoring Australia solutions, this is usually the turning point. The goal is not more paperwork. The goal is earlier warnings, cleaner records, and less time spent checking equipment by hand.
A scalable monitoring architecture starts with one sensor per unit
The cleanest design is usually one wireless temperature sensor or probe per refrigerator or freezer.
In a five-location setup with 18 units, that means 18 monitored points. Each sensor measures the internal temperature and sends readings wirelessly to a gateway. The gateway then passes the data to the online monitoring platform.
A simple architecture might look like this:
Location | Refrigeration equipment | Suggested monitoring hardware |
Location 1 | 5 fridges and freezers | 5 wireless temperature probes, 1 gateway |
Location 2 | 4 fridges and freezers | 4 wireless temperature probes, 1 gateway |
Location 3 | 3 fridges and freezers | 3 wireless temperature probes, 1 gateway |
Location 4 | 3 fridges and freezers | 3 wireless temperature probes, 1 gateway |
Location 5 | 3 fridges and freezers | 3 wireless temperature probes, 1 gateway |
This example uses one gateway per location. That is often the easiest design to manage because each site has its own path to the dashboard. If a location has thick walls, cold rooms, basements, metal racking, or long distances between rooms, it may need more than one gateway or a more careful placement plan.
The key is to design for coverage, not just equipment count.
Use probes that suit the environment
A fridge sensor placed in the wrong spot can give misleading readings. A probe near the door may swing each time someone opens the unit. A probe touching a wall or shelf may read differently from the stored goods around it.
For refrigeration monitoring, temperature probes are often placed to reflect the storage condition inside the unit rather than the warmest blast of air near the opening. Some setups use a buffered probe or place the probe in a small thermal mass where suitable, so readings are less jumpy during normal door openings.
The right choice depends on what is being stored and what standard the facility needs to meet. A lab freezer, vaccine fridge, food storage fridge, and pharmacy refrigerator may have different monitoring rules. The sensor layout should match those rules.
Label every sensor clearly from day one
A dashboard becomes hard to use if sensors have vague names like `Temp Sensor 1` or `Freezer A`.
Good naming makes alarms faster to understand. Use labels that match the real world:
Site name
Room or area
Unit type
Unit number or asset tag
For example:
`North Site, Prep Room, Fridge 02`
`West Site, Storage Room, Freezer 01`
`Main Site, Cold Room, Upright Fridge 04`
This small setup step pays off later. When an alarm triggers, staff should know exactly which door to open without checking a spreadsheet.

Gateways connect rooms and locations to the dashboard
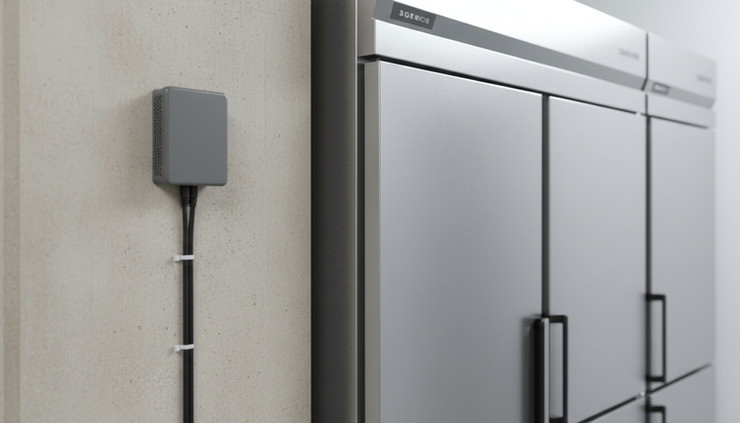
A wireless temperature sensor cannot send data to the dashboard by itself. It reports to a Monnit gateway, and the gateway provides the bridge to the internet.
For a multi-location setup, gateway selection matters as much as sensor selection.
Choose the gateway connection type
The best gateway depends on what each location can support.
Ethernet or Wi-Fi gateway
This suits sites with reliable internet access and a suitable place to mount the gateway near the monitored equipment. It is often a good fit for fixed facilities where network access is already available.
Cellular gateway
This can suit locations where the local network is restricted, unreliable, or difficult to access. It may also simplify deployment when IT approvals take time. A cellular gateway still needs suitable mobile coverage and an active service plan.
The choice is usually practical. If a site has dependable wired internet, an Ethernet gateway may be simple. If the site is remote or network access is tightly controlled, cellular may be easier.
Plan gateway placement before rollout
Wireless range is affected by the building. Refrigeration areas often include metal cabinets, insulated panels, dense doors, shelving, and equipment that can reduce signal strength.
A gateway should be placed where it can communicate reliably with the sensors assigned to it. That may be a central wall position near the refrigeration area, not inside the fridge or freezer itself.
Good placement habits include:
Keep gateways powered from a reliable outlet.
Avoid hiding gateways behind large metal objects.
Place gateways where staff will not unplug them by mistake.
Test sensor signal strength with fridge and freezer doors closed.
Check coverage at the furthest unit, not only the closest one.
If one location has refrigeration equipment split across several rooms, the gateway design may need adjustment. Sometimes one gateway works well. In other cases, two gateways provide cleaner coverage and fewer signal issues.
Treat lost communication as an alarm condition
Temperature alarms are only part of the monitoring picture. If a sensor stops reporting, the dashboard should also flag that.
A missed sensor check-in can mean several things:
Battery needs attention
Sensor has been moved
Gateway lost power
Internet connection failed
Wireless signal is too weak
A good monitoring setup watches both the temperature and the reporting health of the system. That way, the absence of data does not hide a problem.
Centralised monitoring turns readings into usable alerts
The value of a wireless system is not only the reading on the screen. It is the workflow around that reading.
With Monnit Temperature Sensors reporting to a central platform, each refrigerator and freezer can appear as a live monitored point. Staff can view current temperatures, check whether readings are inside range, and see which locations need attention.
For an 18-unit, five-location deployment, the dashboard should make three tasks simple:
See the current status of all units.
Receive alarms when readings move outside set limits.
Review historical temperature data when needed.
Set alarm limits by equipment type
Not every unit should use the same alarm threshold. A refrigerator and a freezer serve different purposes, and different stored goods may have different acceptable ranges.
Alarm rules should reflect:
Equipment type
Stored contents
Internal procedures
Relevant compliance requirements
Normal temperature behaviour during defrost cycles or door openings
Many teams also use alarm delays. For example, a short door opening may cause a brief temperature movement. An alarm delay can reduce nuisance alerts while still catching real problems. The delay should be chosen carefully so it does not mask a genuine failure.
The aim is practical alerting. Staff should trust alarms enough to act on them.
Build an escalation path
An alarm that goes to one person can fail if that person is off shift, driving, asleep, or unavailable.
A better setup uses escalation. For example:
Site staff receive the first alert.
A supervisor receives the alert if it is not acknowledged.
A manager or on-call contact receives the next alert for high-risk units.
The exact path depends on the facility, but every alarm rule should answer four questions:
Who receives it first?
How quickly should they respond?
What should they do?
Who gets notified if there is no response?
The monitoring system can send the warning, but the organisation still needs a clear response plan. That plan may include checking the door seal, moving stock to a backup unit, calling maintenance, or recording the corrective action.
Keep alarms specific
Generic alarm messages slow people down. A useful alert should include the sensor name, location, reading, and alarm type.
A clear message might tell staff that `West Site, Freezer 01` is above its upper limit. That is far more useful than a vague “temperature alarm” notification.
Specific alarms reduce confusion during after-hours response. They also help staff decide whether the issue is urgent. A freezer drifting warm is different from a fridge briefly rising after a delivery.
Historical records help with audits, maintenance, and root cause review
Live alerts help staff respond. Historical records help them prove what happened.
A central monitoring dashboard can store temperature readings over time. This creates a record that can be reviewed later, rather than relying on paper log sheets or memory.
Historical data supports several practical tasks.
Compliance and internal checks
Many facilities need evidence that cold storage remained within required limits. A temperature history can help show readings across a period, including nights and weekends.
This can be useful for:
Internal quality checks
Food safety programs
Laboratory procedures
Pharmacy storage reviews
Maintenance records
Incident investigations
The exact compliance requirement depends on the industry and stored goods. The monitoring system should support the evidence the facility needs, but it should also fit the written procedure staff follow.
Maintenance clues
Temperature trends can reveal issues before a full failure occurs.
For example, a freezer may start taking longer to recover after door openings. A fridge may show wider temperature swings than it used to. A unit may run warm during certain times of day.
These patterns can point to:
Door seal problems
Poor airflow
Overloading
Defrost cycle issues
Dirty condenser coils
Failing components
Staff workflow problems, such as doors left open too long
A single manual reading may miss these patterns. A historical graph makes them easier to see.
Incident review
If an alarm occurs, staff often need to know more than the current reading. They may need to know when the temperature first moved, how long it stayed out of range, and when it returned to normal.
Historical records make that review clearer. They also help decide whether goods can remain in use, must be assessed, or should be discarded according to the organisation’s procedures.

Adding more sensors should not require a redesign
A strong monitoring setup should support growth. If the facility adds another refrigerator, freezer, cold room, or ambient storage area, it should be possible to add a sensor without rebuilding the entire system.
That is one reason wireless sensor networks suit multi-site refrigeration monitoring. The facility can start with the 18 required temperature points, then add sensors as needs change.
Possible additions include:
More fridge and freezer probes
Ambient room temperature sensors
Humidity sensors
Door open and closed sensors
Water leak sensors near plant rooms
Power monitoring sensors where suitable
The dashboard can then show more than refrigeration temperature alone. It can become a wider facilities monitoring view, still organised by site and area.
Use templates for repeatable setup
As the sensor count grows, consistency matters. Alarm limits, naming rules, notification groups, and reporting intervals should follow a standard pattern.
A repeatable setup process might include:
Add the sensor to the correct site.
Name it using the asset naming convention.
Assign it to the correct gateway.
Apply the right alarm template.
Test the reading and signal strength.
Trigger a controlled alert to confirm notifications.
Record the sensor location and purpose.
This prevents a system from becoming messy after the first rollout. It also makes training easier for new staff.
Review the dashboard layout as the system grows
A dashboard that works for 18 units may need better grouping when it reaches 30 or 50. Sites, rooms, equipment type, and risk level should be easy to filter.
Good dashboard organisation helps staff find the right information fast. It also keeps alerts from becoming background noise.
A multi-location system should answer simple questions at a glance:
Which sites are normal?
Which units are in alarm?
Which sensors have stopped reporting?
Which alarms have been acknowledged?
Which units have repeated temperature events?
When the system can answer those questions clearly, it becomes part of daily operations instead of another screen to check.

What a successful five-location rollout looks like
A good refrigeration monitoring project does not need to be complicated. It needs a clear design.
For 18 refrigerators and freezers across five locations, a practical Monnit-based architecture would usually include:
One suitable wireless temperature probe for each fridge or freezer
At least one gateway at each location
Tested wireless coverage for every sensor
Clear sensor names that match real equipment
Alarm thresholds based on storage requirements
Escalation rules for after-hours events
Historical records for review and reporting
A process for adding more sensors later
The result is a dashboard that shows the whole refrigeration network in one place. Staff can still inspect equipment, maintain procedures, and respond on site, but they no longer rely only on manual checks to discover problems.
The main takeaway is simple: build the monitoring system around the real equipment map. Start with the 18 units, group them by location, choose gateways based on site conditions, and make the dashboard clear enough that an alarm leads straight to action.


Comments